
Pantry Organization is essential to having a good working space in your kitchen that can fully serve the Queen Bee and all her hungry little bees.
Most pantries are inadequate, probably because most kitchens are designed by men. Women should help design their kitchen whenever possible so the pantry is large, fully accessible, and well-lit.
Extend your pantry space as much as you can with over-the-door hooks, hangers, racks, and maximum shelving.
Expand your pantry organization into other areas in and around the kitchen if you need the space. You could use a closet in the hall, a nice looking entertainment center or hutch, or perhaps you an underutilized interior wall that could have built-in shelves put in.
That’s what my mom did. She had a nice size pantry next to the stairwell, but wanted a bigger pantry. So she put a lower ceiling in her stairwell and used the empty stairwell space to build a large kitchen pantry which doubled her space!
Are there any underutilized areas that you could put in more pantry shelving in your house?
Remember the following acronym:
The I. C.A.N. D.O. I.T. Pantry Organization Guide
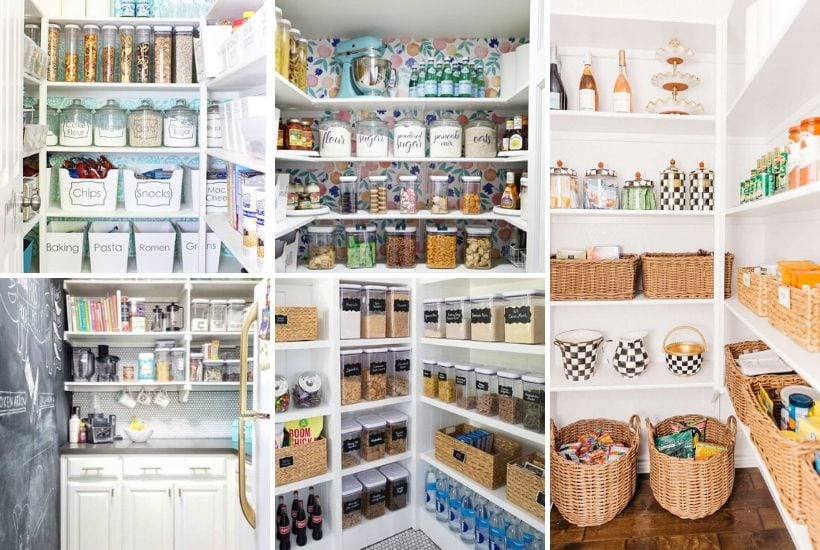
I = Imagine what you want. Look everywhere for photo ideas for great pantry organization ideas.
C = Create desire to get your pantry organized. Get motivated and then cooking and serving your friends and family will be a cinch!
A = Assess what’s working and what’s not working.
N = Note down your written action plan. Create regions for everything in the pantry, i.e. cans, boxed foods, cold cereal, food storage, etc.
D = Determine your containers. Choose the right containers that will make it easy for the family to all the “like” items together.
O = Organize your stuff. Clear & Clean the pantry, then speed sort.
I = Inscribe a label on your containers. Label. Label. Label. Then everyone can put EVERYTHING away all the time!
T = Traits and habits will maintain your pantry organization. Teach the family to maintain the pantry with good habits that bless the whole beehive!
8 Steps to Sweet Pantry Organization:
Step 1: Imagine the pantry you desire.
Two of the most important ways to help a child feel secure are if the parents don’t fight and if the fridge is full. The pantry is an extension of the fridge, so work to have a fully stocked pantry.
Step 2: Create desire to be organized.
Find your motivation. Get motivated. Why do you want an organized pantry?
Step 3: Assess what you have and what you need.
Assess what works with your family and what doesn’t work.
Write a list of what you want, or just look at what your family eats as a typical menu plan for the month and stock that in your pantry.
What is your families organization style?
Do you have toddlers with low ability, children with medium ability, or teenager with high ability level? Make it easy for your family to put things away by doing what works with their ability style. And if they are living beneath their abilities – motivate them to raise to the occasion and do better!
Step 4: Note down your written action plan.
Draw a sketch of your pantry areas and put the regions on paper. Moving hundreds of cans several times isn’t efficient. Make a good plan so you don’t have to move the cans several times.
CREATE REGIONS:
Do you have a region for the following?
- canned food
- dried food like dried apples, bananas, onions, eggs
- bagged foods like chips and cereal
- red, white, kidney, and black beans
- grains such as rolled wheat, oats, cornmeal, brown rice, white rice, popcorn, corn masa
- oil, vinegar, honey, peanut butter, vegetable shortening,
- Noodles, macaroni, etc.
- non-food items like paper dishes and cutlery
- spices
- Dried Milk (I store non-fat dry milk for my 30 year long-term storage and Morning Moo Milk for drinking which is delicious when we don’t have time to go the store.)
- Chocolate, Vanilla, and Banana Pudding
- packaged foods and dessert mixes
Have your buddy check your pantry plan to see if you can generate any more ideas together. Sometimes when 2 minds combine it’s like a third mind is created and you get even better ideas! Remember, bees need other bees. Let your friend help you and you can help them when they do their pantry.
Step 5: Determine the containers.
Find containers that fill the space with “a perfect fit.”
Here’s some of the containers you may want:
- small and large clear spice containers
- gallon sized storage containers (#10 tin cans, plastic containers, or glass jars)
- 5 gallon buckets for bulk food storage
- cardboard boxes
Step 6: Organize your pantry.
REMOVE EVERYTHING:
Remove everything from the pantry and put in on the table or bar. Worker bees (children) love to help moving and stacking cans. Assembly lines are especially fun – you can even get neighborhood children to help be your worker bees. It might be a little messier and a little less efficient, but it builds fun memories, builds self-esteem and builds family love because they are getting to serve the beehive and serve you the Queen Bee.
CLEAR & CLEAN:
Wash the shelves, dust, vacuum and clean the floor quickly.
SPEED SORT:
Speed sort into 5 boxes and a large table for all the extras. The acronym for the 5 boxes you will sort into is T.O.A.D.S.: Trash, Other Room, Action Box, Donation Box, and Storage Room. Most everything else will stay on the kitchen counter and just sorted into regions and then ONLY put back what you really want, need or use in the pantry.
CREATE REGIONS:
For example, all the canned food is a region so put all canned food together. Put like items with like items then it’s easy to find in one area. Spices would be another region, cold cereal, snacks will be other regions.
Step 7: Inscribe on each container.
Label all the boxes, shelves, and/or containers with a marker, labeler, or with words or pictures so everyone can put things away correctly. Inscribing is critical!!! Do you really think the family can memorize where everything goes in the pantry and put away 400 items where it should go without a label? Inscribe. Inscribe. Inscribe. Labeling is how you designate a place for everything and insist on everything being in it’s place.